|
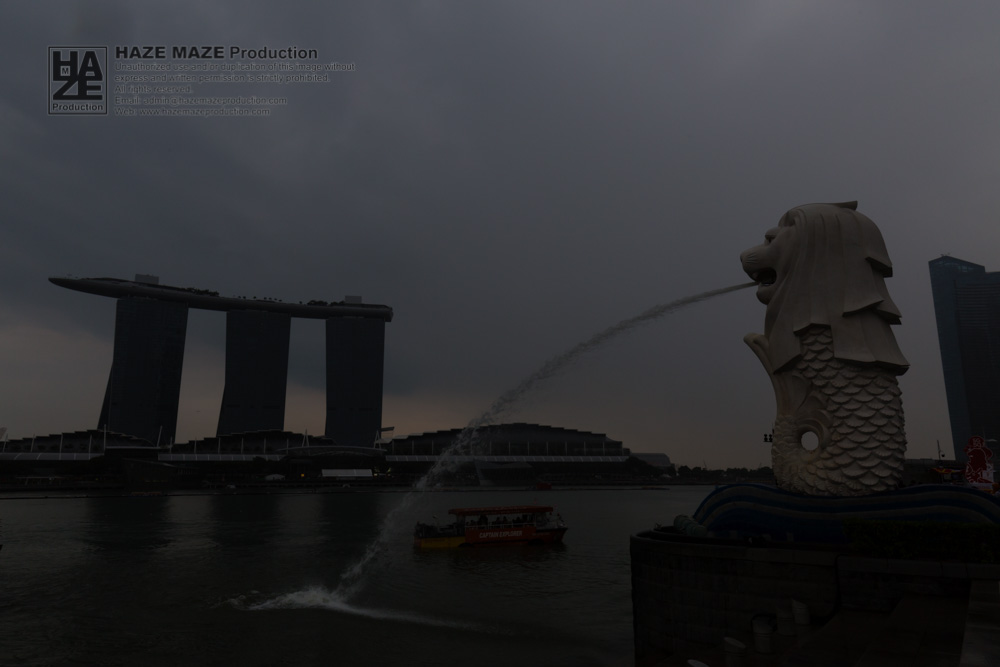
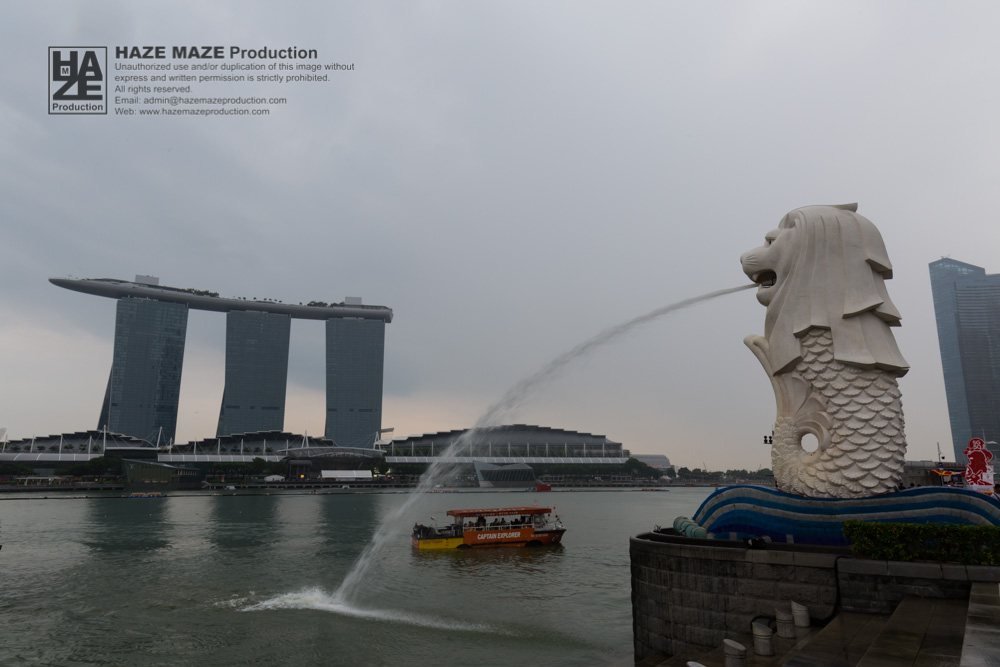
Have you taken a photograph of any landscape scenery and wondered why the sky is blown out? Or when your sky is properly exposed but your subject is too dark? This is where HDR technique comes to play in post processing. According to Wikipedia, “High-dynamic-range imaging (HDRI or HDR) is a set of techniques used in imaging and photography to reproduce a greater dynamic range of luminosity than is possible with standard digital imaging or photographic techniques.” A camera has a maximum dynamic range that it can capture in one shot. A mid-range DSLR has an average dynamic range of 10-14 stops. What it means is the camera can capture the numbers of lights and darks in the picture with the range measured in stops. In order to expand the dynamic range of the photograph, photographer will take several images of the scene in different exposures and merge them into one image. While merging, we will have the control of the brightness of the highlights of the sky and the darkness of the shadow. Therefore, it is called high-dynamic range image. Example of a series of images taken for HDR processing:
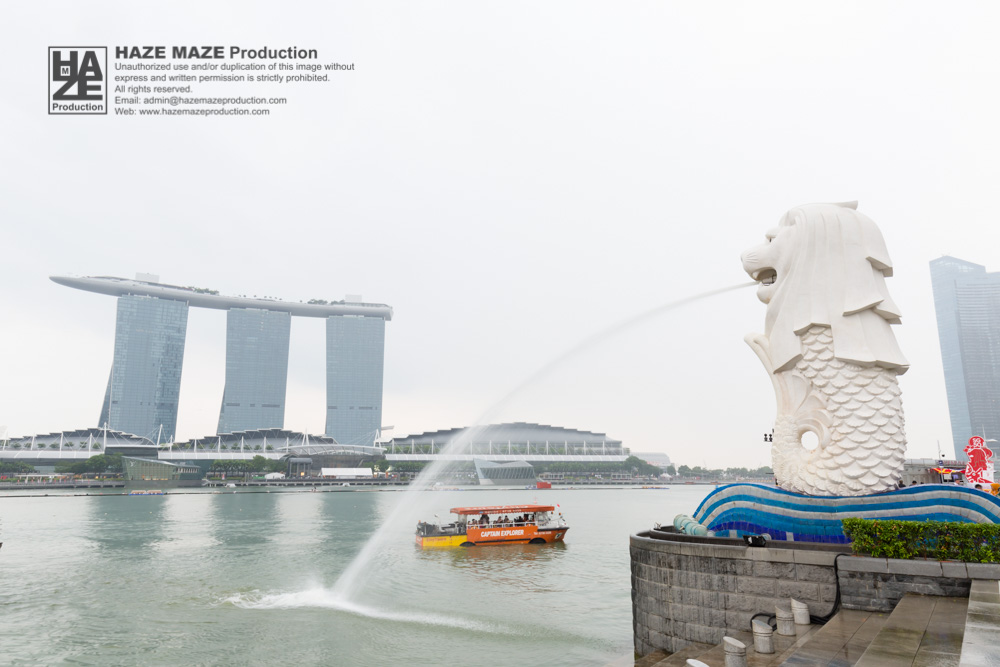
Example of a HDR image:  As you can see HDR image can bring back textures of the clouds in the sky and the tiles on the bottom right of the image. Depending on the climate condition of the shooting time, technically it can be done with one shot. However, if you are travelling and you do not have much time to wait for the perfect lighting. HDR is your best bet.
1 Comment
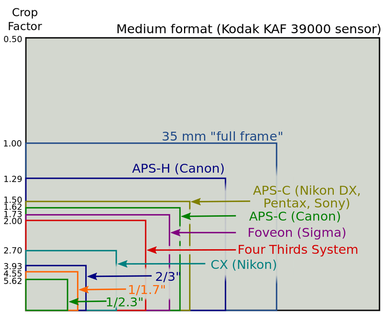 There are many camera manufacturers in the digital imaging market globally and most of you may know two of the major manufacturers are Canon and Nikon. Whichever the manufacturer they are, they have a wide range of cameras cater for people in any levels. It usually divides their market by differentiating the camera sensor size, for example, entry-level cameras are advanced photo system type-C (APS-C) sensor and professional cameras are usually full frame format and may go up to medium format camera.
With many types of sensors in the market, camera manufacturers market their cameras by focusing of the number of pixels, their individual microchip processor and the size of the LCD screen of their cameras. But how many pixels you actually need? If you print 4R photos (4 x 6”) regularly, take 300ppi (pixel per inch) into consideration, you will only need 1200 x 1800 pixels. Which takes only 2.16mp megapixels to print a 4R photo. An entry-level camera with 18mp is way more than enough to print a regular 4R photo. Therefore, don’t get mixed up by looking into the megapixels when buying a new camera. Yes, more megapixel may have more room for you to crop your image but it also means that more storage is required for the larger file size. So, compose your photos in camera by walking towards or away from your subject and you will still be able to capture high quality images without high megapixels camera. Not doubt that the larger the sensor, the better the camera performs in terms of bokeh (out of focus). For example, bokeh effect can be achieved easier and more pleasing to the overall image for larger sensor compared to a small sensor. However, smaller sensor can also create bokeh by zooming in your lens and focus closer to the camera. The bokeh effect achieved is very similar to a larger sensor camera. Does camera sensor size really matter? Yes, when capturing images in low light situations or managing huge prints. Larger sensors are capable of capturing more lights and handles ISO more better compared to a smaller sensor. Therefore, when printing large prints, it is ideal to use a larger sensor camera. 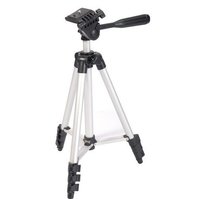 A piece of equipment often overlooked by camera buyers. You will see most exhibitors at IT shows or COMEX giving out free tripod with almost every camera purchased. So just how important is it to get a good tripod? Tripod is an essential support for your camera for long exposure shots. It helps to keep your camera stable in most climate conditions. On top of that, time-lapse shooters may also love to use it, as they are likely to stay around in an area for couple of hours. At these situations, carrying a tripod with you will ease your shooting experience a lot. Last thing you want to happen is go home with a blurred image or wobbly time-lapse after spending so much effort and time has been put in. 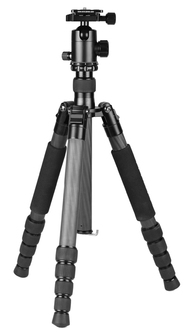 Cost of a tripod can vary from a couple of dollars to thousands. For general shooting such as taking landscapes or group photos, you will probably be fine with an average tripod. A cheap tripod can get the same job done. However, they may not last long and tendency to have weaker legs to support any cameras. They are probably lighter in weight and if you put a heavier camera on top of it, it can become top heavy and fall easily.
When purchasing any tripod, take note of the maximum weight load of the tripod can handle. If possible, bring along your heaviest camera setup to the shop and test the tripod. Last thing you want to happen is thousands of dollar camera and lens dropping on the ground because the tripod cannot take the weight load. When choosing the right tripod, try to figure out your budget and do your research at different types of tripod brands available. Ideally, we would suggest carbon fiber tripod because it is lighter, sturdier and holds a good amount weight load. It will likely to cost more than aluminum tripod but it will last longer than them for years to come. Most of the digital cameras are so advanced that makes people wonder why do they need a photographer when they can take nice photos by on their own. Hiring a photographer isn't just about carrying a heavy DSLR with expensive lens on it walking around taking photos. It is about getting creative images that stand out from the rest and using the correct camera setting for it. Sure enough, putting any camera in auto mode and you are ready to shoot for any events and even weddings. But does that make the person a photographer? We will talk about a few main points that a photographer sees before taking a photo.  Environment An experienced photographer will know the different kinds of lightings in any environment. Regardless of fluorescent or incandescent lightings, it will affect the image a lot. We call this white balance. What it does is to balance the color temperature and show “white” as white. It is a way of measuring the quality of the light source based on warmness or coolness measured in Kelvin. Which is why on most DSLRs you will see the white balance measured with a set of numbers followed by (K). A wrong white balance setting can cause a white object to look yellowish or bluish in the photos. Flash Not all photographers use flash nor all events require using flash. It all depends on the lighting conditions and the type of camera the photographer using at the point of time. Lighting will differ from venue to venue and events going on indoor and outdoor simultaneously. So photographers are geared to tackle these kinds of lighting issues at all times. Why we mentioned about the types of camera is because technology in photography is so advanced now that the camera can shoot in a dark condition even our human eyes can't see properly. Therefore, flash is subjective when using such good camera. 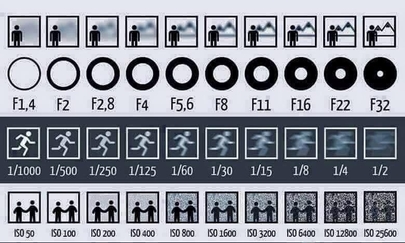 Aperture, Shutter and ISO Here comes a more complicated part of being a photographer. But once you understand the concept, you are able take control of your exposure and ditch auto mode for good. There is a lot of confusion going on when you first come in contact with exposure triangle, we will try to explain it as simple as possible. Let’s go… Aperture is to control your depth of field, the focus area, measured in f-stops. Usually you hear photographers saying F2.8, F4 etc. and even on the lens itself, this is to set the area that you want it to be in focus. The smaller the number the smaller the focus area is. For example, if you want to take a photo with just your subject in focus and background out of focus, you will likely to use F4 or lesser to achieve it. Or if you are taking a group photo of your family members, you will likely to use F8 or larger to make sure everyone in the photo is in focus. Shutter speed will depend on the movement or the activity of the subject you taking photograph, measured in 1/number to seconds. The numbers at the back represent the opening speed of the shutter of your camera. A slow shutter speed (e.g. 1/10) will cause your image to be blurred because the shutter opening is too long for sensor to capture a sharp photo. It is useful of you are taking a non-moving object or you want to capture a silky smooth waterfall. A fast shutter speed (e.g. 1/160) will stop the movement. For example, a sports event and you want to freeze a runner in action. You will need shutter speed of 1/1000 or faster. ISO is the sensitivity of the camera sensor and it varies from camera to camera on the performance. Some camera is able to perform up to ISO 25600 while some topped at ISO 12800. ISO will affect the noise in your images and the term noise technically means the amount of gains in the pictures. A higher ISO will make your camera sensor more sensitive to light and introduce more gain in the photo. Ideally, you would want your ISO settings to be as low as possible. On the right is an example of how aperture, shutter speed and ISO function. After knowing each function, we now put these 3 together to create an exposure for an image. Sometimes by looking at the camera settings without looking at the picture, you can tell how is the lighting condition on the actual environment. For example, in manual mode, we have settings like let’s say F8, 1/125 and ISO 6400. The lighting condition for these setting can be very dark and maybe the photographer is trying to take a group photo. Usually in any scenarios, the photographers get to decide which two settings are more important compared to another. For example, we want our image to be out of focus and less grainy image. We will need the setting to be somewhere F2.8, ISO 100 and let the shutter speed compensate for the overall exposure.
These are the brief fundamentals on the exposure triangle. Knowing which area is more important compared to another and let the third exposure element to compensate the rest. Let us know if you have any questions with regards to this week’s topic by contacting us here. |